Hey all, I'm back with yet another homemade laundry soap recipe. After fine tuning my previously used powder recipe (found here) I've come up with something super simple & quite possibly the easiest & most effective soap blend we've used to date!
What you'll need:
-Borax
-Washing Soda
-Baking Soda
-Zote Soap Flakes
-(OPTIONAL) Scent Boosters (Purex is the favorite around here)!
You can also swap out the scent boosters for essential oils as well! ;)
Recipe? Just mix 1 cup each of the Borax, Washing Soda, Baking Soda, & Soap Flakes together with one cap of the Scent Boosters. Seriously, SUPER easy!
If you're like us & do a lot of laundry on a weekly basis, mix 2 cups each of the Borax, Washing Soda, & Baking Soda with the entire box of Soap Flakes & 2 caps of the Scent Boosters.
To measure out I use a Scent Booster cap for my measuring cup. Typically 1 cap for small loads, 2 for large will do the trick! For a little extra cleaning punch (especially for those whites!) I add in 1/4 cup white distilled vinegar to keep out clothes nice & clean.
Cost...
For starters a box of Borax, Washing Soda, & Baking Soda will run you about $10. A box of Zote Soap Flakes is slightly less than $3. Scent Boosters run from $5-8, depending on brand.
On average, our family of 5 (7, if you count the pups!) racks up about $15/month in laundry soap costs. In comparison, we were running at nearly $10 per WEEK for free/clear liquid laundry soap! Needless to say our wallets are slightly happier now with this new arrangement. If you still prefer liquid detergent to powder, check out my awesome homemade liquid detergent recipe on the blog!
Have a favorite DIY laundry soap recipe? Feel free to post below...I'd love to check it out!
So x3 has been on a HUGE play dough kick for the last month or so. Problem is I found myself continuously piking up dry crumbs and having to dump after only a use or two of the store bought stuff, which is an all around waste of money and product. So I decided to go back to a tried & true homemade play dough recipe I found when x1 & x2 were littler & added some scented oils in for a fun twist!
What you'll need:
3 cups flour
1.5 cups salt
6 tsp. cream of tarter
3 tbsp. oil (I just used vegetable oil)
3 cups water
20-25 drops essential oils of your choice
food coloring (optional)
Mix all ingredients in a large pot over medium heat, or closely monitor your little monsters doing so. :)
Consider CAREFULLY when it comes to oils, as some scents are more powerful than others & need to be used with a greater amount of caution around littles (peppermint, anyone?), so please make sure you do your homework here!
For this batch x3 chose a berry blend. Some suggestions are lavender, if you want the dough to have a "calming" effect, or even eucalyptus for those suffering from stuffy noses!
Continuously stir. Dough will start to form a ball/pull away from sides of the pot after a few minutes.
Flip dough ball onto smooth surface & knead when cool enough to handle until you get that play dough texture! I prefer wax paper for this part, as sometimes the dough will stick at first to a counter or cutting board!
Yields 4 "servings" of play dough (I added in the cream of tartar container for a size reference!). Store sealed when cool & not in use. I used some plastic dollar tupperware we had laying around. When stored properly (cool/dry place), I've had batches last up to 3 months before it began to dry out or crumble!
Optionally, if you'd like colored dough, you can add in the food coloring of your choice during the kneading process. I take each dough ball & quarter it, adding 2-3 drops of color per section, & then kneed it all back again whole.
And, yes, I use gloves. I hate having stain on my hands. :p
And there you have it! Quick & easy, the whole process took me less than 30 minutes for x3 & I to do, & over a week later we're still enjoying the play dough on a daily basis!
I don't know about you all, but it's definitely cold season in our house! Which means lots of stuffy noses & congested children.
One of my favorite homemade remedies for these sickies are our homemade shower soothers! Quick & easy to make, & super affordable, especially when compared to their OTC counterparts!
For starters, you'll need some baking soda, water, baking molds, & essential oils.
Mix 2 cups of baking soda with 1 cup water until the mixture starts to ball up/stick together.
Grab your baking mold & fill each mold half way with the baking soda/water mix. While muffin tins w/liners will work in a pinch, I much prefer my silicone molds, as it's easier to pop the shower soothers out when done!
Time for oils! Add in approximately 10-12 drops total per soother. Typically I'll do 3-4 per oil.
The best essential oils for the job are rosemary, peppermint, eucalyptus, and lavender, to ensure the soothers are family friendly & safe for all ages. I do add camphor oil to mine occasionally, but never for the monsters.
After the oils are added, use the remaining baking soda/water mixture to fill in your molds.
When everything is full, bake in the over for about 15-20 minutes at 350*.
When done & cool, pop out & store immediately in a sealed contained or Ziploc bag.
Usually will stay for a good 6-8 weeks as is, or, if you want to add additional scent before use, up to 6 months total.
To use simply place in the shower, out of the direct stream of water, but close enough that the steam activates the scent.
Just remember, while there are tons of variations online as far as amounts, times, quantities, this is what works best for us. Poke & tweak at the recipe if needed til it fits your family's needs just right!
The other day a friend of mine tagged me in an experimental "body positivity" project on Facebook.
In the day & age we live in, one can hardly turn around without having some bombardment of "beauty" in our face, showing us flawless bodies in perfect clothes & goddess like features. Something us every day people feel like we will never achieve, so we hide our insecurities behind clothes, jewelry, & makeup, burying the true beauty inside deep within. & never, I mean EVER, post the real you on social media outlooks, because that will never live up to another's unrealistic expectations.
So the point of this project is simple. Just post a picture of YOU, no hair or make up done, no fancy clothes or blinged out accessories, & share it for the world to see that beauty cannot be defined by one common image. Natural beauty, rather, is as diverse as the individual it belongs to & should be celebrated, not hidden away.
So, without further ado & looking past all the flaws I see, here I am for all the world to see. Anyone else up to the challenge?

Speaking of pictures, I know a few of you had asked about the Monsters daily photo challenge. It's going well, however Daddy has been home the past few weeks, so there's really nothing to share on here. Never fear though, I'm sure they'll be wanting to do more entries soon! ;)
I've gotten quite a few questions about green cleaning products & how to make your own while on a budget, so I decided to share one of my favorite recipes today!
Super simple (only 2 ingredients!) & cost effective, this little mixture works on practically anything I need disinfecting in both the kitchen & the bathroom with no harsh chemicals or residue! Awesome, right?
First, gather up some of your favorite citrus & start peeling!
The Monsters are addicted to "halos" (mini oranges) at the moment, so I usually buy the big 5lb bag & divide the peels between 2 glass jars. Peeling all the fruit at once isn't exactly necessary, but it helps ensure that all the peels are equally fresh when it comes time to add the vinegar!
Once everything is peeled, fill the jars to the neck (leaving about an inch or so under the lid) with white vinegar, screw on the lid, & store in a pantry or cabinet for at LEAST 2 weeks (no more than a month). After 2-3 days I'll usually check on my jars & see if the peels have settled & add more white vinegar if necessary.
After time is up, put a strainer in a bowl & pour our the jar's contents so that the peels are separated from the citrus-infused vinegar.
Toss the peels (or use them to freshen up the garbage disposal!) & pour the citrus vinegar into a spray bottle.
If necessary, add just a bit more white vinegar to the bottle to help mix & fill it up!
Now you're all set to start spraying & scrubbing away! Seriously, one of the best things I've every used as far as tub stains & greasy stoves are concerned.
Have another favorite green cleaning recipe? Feel free to link it in the comments! :)
Cloth diapers, wipes, nursing pads, mama pads, unpaper towels. It was only a matter of time before we made the switch to cloth toilet paper!
Last week I issued a "One Week Challenge" around the house. No conventional TP for a full week. Gwen was all for it, since she's been using cloth wipes since day 1. Drew & Lyn were easily convinced after I promised special alien & unicorn TP for them, respectively. DH, well, he liked the theory & cost savings potential, but was a little leery of actually -using- the cloth sheets & only agreed if I made "extra large tissues" for him. Sigh. Whatever it takes, right?

Anyway, 3 days in the the whole crew was HOOKED. Drew & Lyn were even spreading the word about their "super cool" TP to their friends at school. =)

The break down....my guess is that we have a total of 60-75 pieces of cloth toilet paper floating around the house at the moment, including Gwen's cloth wipes, which are still going strong after 2 years of use! The rest was made from flannel I've had for awhile that was just sitting unused in a tote. Dirties are stored in extra wetbags, which, again, I've already had for some time. The only start up purchase I made was 2 vinyl woven baskets to use as TP holders, a whopping $1 a piece at Dollar Tree.

The results thus far...an extra 2-3 loads of laundry a week, which the loads themselves honestly are actually less nasty than some CD loads Gwen's given me to clean in the past. Easy enough to wash, as I've just been doing the same routine for the TP as I've had for the diapers.

The savings...on average between the 5 of us we'd go through 3-5 rolls of TP a week, in part of overusing & Gwen trailing it all around the house. In other words, a total waste of a good $20/month in TP products.
So in using cloth toilet paper, that's an extra $200-250 a year in our pocket in exchange for a few more loads of laundry. Not too shabby, if you ask me!
Since my last post about homemade laundry detergent contained a liquid recipe that, let's face it, required LOTS of time to make (not to mention storage space!) I decided to explore different recipies.
Among all the liquids, creams, & pastes I found that the dry/powder mix of ingredients is by far my favorite. Not only does it clean better for us than the others, but it's so much quicker to make & easier to keep!

Here's what you'll need:
1 cup Borax
1 cup Washing Soda (NOT Baking Soda!)
1 bar Fels Naptha (I've also heard that Ivory bar soap makes a good substitute, but haven't personally tried)
1 cap full Laundry Crystals (optional/scent & 'freshness' booster)
Directions
Shred bar soap, either using a cheese grater or food processer & pour shavings into container.
Add in Borax, Washing Soda, & crystals.
Close lid & DONE. Seriousy, it's that simple. The whole process for just 1 bar takes maybe 5 minutes of my day to make! 2-3 tablespoons per load typically do the trick. ;)

Personally I quadruple the recipe (4 of everything!) & keep our powder stored in an old gallon-size ice cream tub. Between 5 peoples worth of clothes, towels, bedding, 2 pets worth of laundry, uniforms, PT clothes, etc, just ONE of these gallons last us an entire month! The only negative (if you consider this to be so) I've found is that it builds up quicker on cloth diapers than liquid detergents or cloth specific detergents, so you might have to strip them more frequently. ;)
As far as cost is concerned, it's around $1 per bar of Fels Naptha, $3/box for Washing Soda, $3.50/box Borax, & $4/bottle of Purex laundry crystals. I've had the same bottle of crystals for 3 months now & have just enough left for one more big batch. Washing Soda & Borax boxes typically last us about 2 months each.
What does all this mean? Simple...just ONE gallon of our DIY powder soap cost $8.25. That's all our laundry for a month, fresh & clean for less than $10! So much more economical that store bought detergents!
Recently we were gifted with a Crabby sandbox for the monsters. With warmer weather moving in I started doing my typical price comparison online for where I could get the most sand for the least price.
Then I found this article on sandbox sand, written by Katy at Non-Toxic Kids.
Yike. Cancer causing sand? REALLY!?!?!? I looked around & sure enough most of the 'playground' or 'sandbox' sand sold locally through most large retail stores here is labeled with 'Not for sale in California'.
So I started the search for safe, non-toxic, silcia & asbestos free sand. I found two companies, Silica Free Sand and Safe Sand. Biggest downfall? Price. You're looking at $1+ per pound for sand, which is in the neighborhood of $50-60 for a small sand/water table & upwards of $200 for a standard sized sandbox. No thanks.
My solution to this year's sandbox dilemma....dirt. It's available for as little as $1/bag & harmless. For the monsters, digging is digging. Rather be safe than sorry! =)
If you haven't figured it out by now, the monsters like to do a LOT of homemade gifts. Last week's adventure........bath salts!
We used Epsom salt, sweet almond oil, food coloring, essence oils, funnel, & a variety of collected plastic & glass jars from around the house.

First, pour 3 cups Epsom salt into bowl A & 3 cups of salts into bowl B. Add 1/4tsp sweet almond oil (optional), 6-9 drops food coloring, & 3-6 drops oil, scent of your choice. We chose Berry for our pink/red & Peppermint for our green. Mix well / til completely blended.

While we were mixing up our salts we started talking about names for our scent. Mint Berry, perhaps? Nope....the winner was Berry Minty. Because, according to Drew, "...it's berry, like berries AND very, & then minty! Get it mom? Huh?" Yeah, he's my comic relief alright. ;)

Now the fun part....layering! The funnel DEFINITELY helped reduce salt-spillage. For an added bonus we also added the little bit of white salts left over from earlier.

All done! =D


Next week = Winter Break. I'm thinking I might have to pull out an old TP roll craft. Stay tuned!
Happy Earth Day to all my other crunchy mommas out there!

To celebrate, mommyx3monsters is offereing 50% off the listed price for ALL items in our Facebook 'Seconds' album! First come, first serve!
Today is also the 2nd edition of DIY Fridays...since I'm out of town at the moment I don't have any pictures but I DO have a super quick & easy recipe for DIY dishwasher detergent that I found awhile back on tipnut.com.
All you need is 1 cup each of Borax & Washing Soda. Shake/mix well in a closed container. Use 2 TBSP per load & 1/2 cup White Vinegar in the rinse compartment & voila! Super clean dishes. For us it's worked even better than store brand...no greasy film!
Enjoy & have a great holiday weekend! <3 Maddie
I figured I'd kick off DIY Fridays by showing off one of my favorite finds...homemade liquid laundry soap. It's incredibly easy to make & super inexpensive. A little really does go a LONG way here.
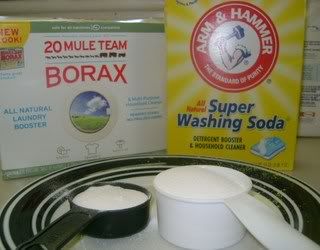
While looking for a few money saving tips one day I stumbled across the Duggar Family's 'Favorite Family Recipes' page & figured it was simple enough to at least try. All you'll need is some Borax, Washing Soda, bar soap (Fels-Naptha or Ivory are highly recommended), water, a sauce pan, & a stock pot/bucket that can hold *at least* 2.5 gallons.
After a few tweaks to the original I've come up with a recipe yielding approx 5 gallons of laundry detergent, so it's highly recommended you save your old detergent containers & juice bottles! Some people I know have used milk jugs, but I find the plastic on these a little too thin & flimsy for this purpose.
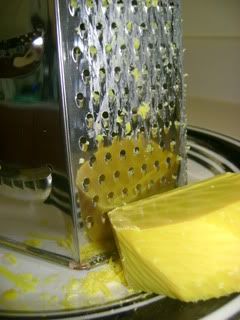
To start off you'll need to grate 1/2 bar of soap. I prefer to use the small side of a cheese grater, which gives off a 'fine' texture. Seems to melt quicker/easier.
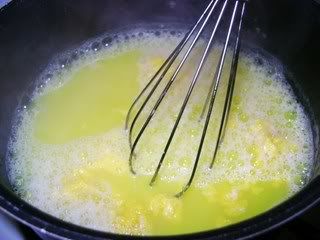
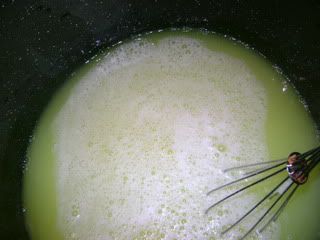
Bring 2 cups of water to a low boil over medium heat & mix in soap, constantly stirring. I prefer a whisk, as it helps the soap dissolve better. It tends to clump up on wooden spoons & the like.
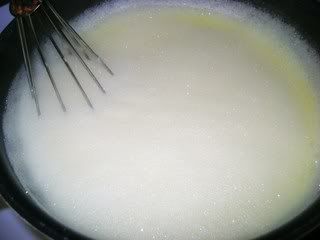
Do NOT let the soap boil over...if this starts, decrease the flame & continue whisking until all the soap is melted. When it reaches a foamy/creamy consistency, it should be ready.
Fill you 2.5+ gallon pot/bucket half full of -hot- tap water. Add in 1/2 cup Arm & Hammer Washing Soda & 1/4 cup Borax. Whisk until dissolved. Next, add in melted soap & whisk until even.
Pour in another gallon of hot tap water to complete the mixture. Stir well, cover, & let sit overnight (best 12-16 hours) to thicken & 'gel'. Optionally you can add in about 5 drops of essence oil per gallon of soap. My personal favorite is a fresh citrus blend...15d lemon oil, 5d grapefruit oil, & 5d mandarin/orange oil. Other highly recommended scents are lavender & tea tree oil.
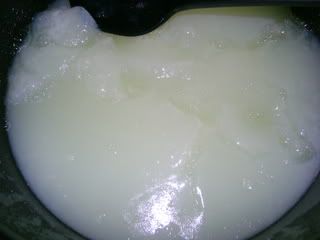
After detergent has sat & gelled, mix detergent, trying to get the gel in the smallest clumps possible. Clean our your bottles/containers and fill half full with hot tap water.
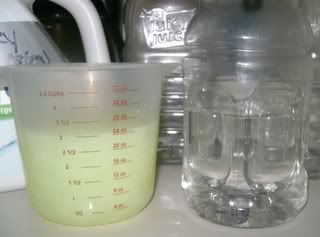
Measure out half the amount of your container & pour in. For example, I'm using a 48oz juice container & am pouring in 24oz of the soap mixture into 24oz of hot tap water. This is easiest done with a large funnel to prevent from major splashing/spills. After the detergent is in the bottle, shake well to try to break up as much gel as possible.
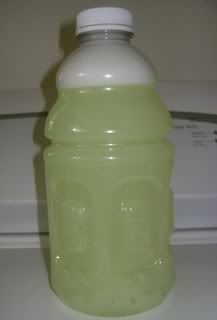
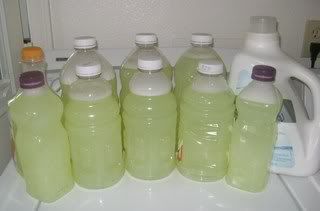
All that's left now is to label (if you choose) & you're done! Homemade laundry detergent at it's finest. Again, this recipe yield 5 gallons of soap, which, for me, equals out to (1)gallon container, (3)64oz containers, (1)60oz container, (3)48oz containers, & (2)32oz containers. Needless to say family, friends, & neighbors have samples coming their way. =)
On to cost...thanks to the power of eBay I was able to get a 76oz box of Borax, a 55oz box of Washing Soda, & 2 Fels-Naptha bars for $24 w/shipping. Total, I'll get 20 GALLONS of soap out of this, with plenty of Borax & Washing Soda to spare. For those of you keeping track at home, that equals out to $1.20 per gallon of soap. The SINGLE gallon of Purex soap I bought/reused the container....yeah, $7.50 with coupons. Another benefit? I can use this soap even for my girls, both of which have super sensitive skin & can't use most detergents because they breakout from the added chemicals.
Green on so many levels...gotta love it.
And there you have it...the wonder that is cheap, easy, & wonderful DIY Laundry Detergent! Happy Friday everyone!


